Ursula's Den: Tatami
I've started working on a new scene!
I'm building a refurbished bear cave for our resident doctor. Ursula lives alone and her hobbies are gaming, sleeping and preserving berries (of course she also enjoys a bit of embroidery and sewing but that's more to keep her fingers nimble in case she needs to stitch up one of her patients).
So, what the bear cave needs is a cosy little bedroom, a well-equipped kitchen and an area where she can demolish every noob on the planet, aka gaming desk and chair.
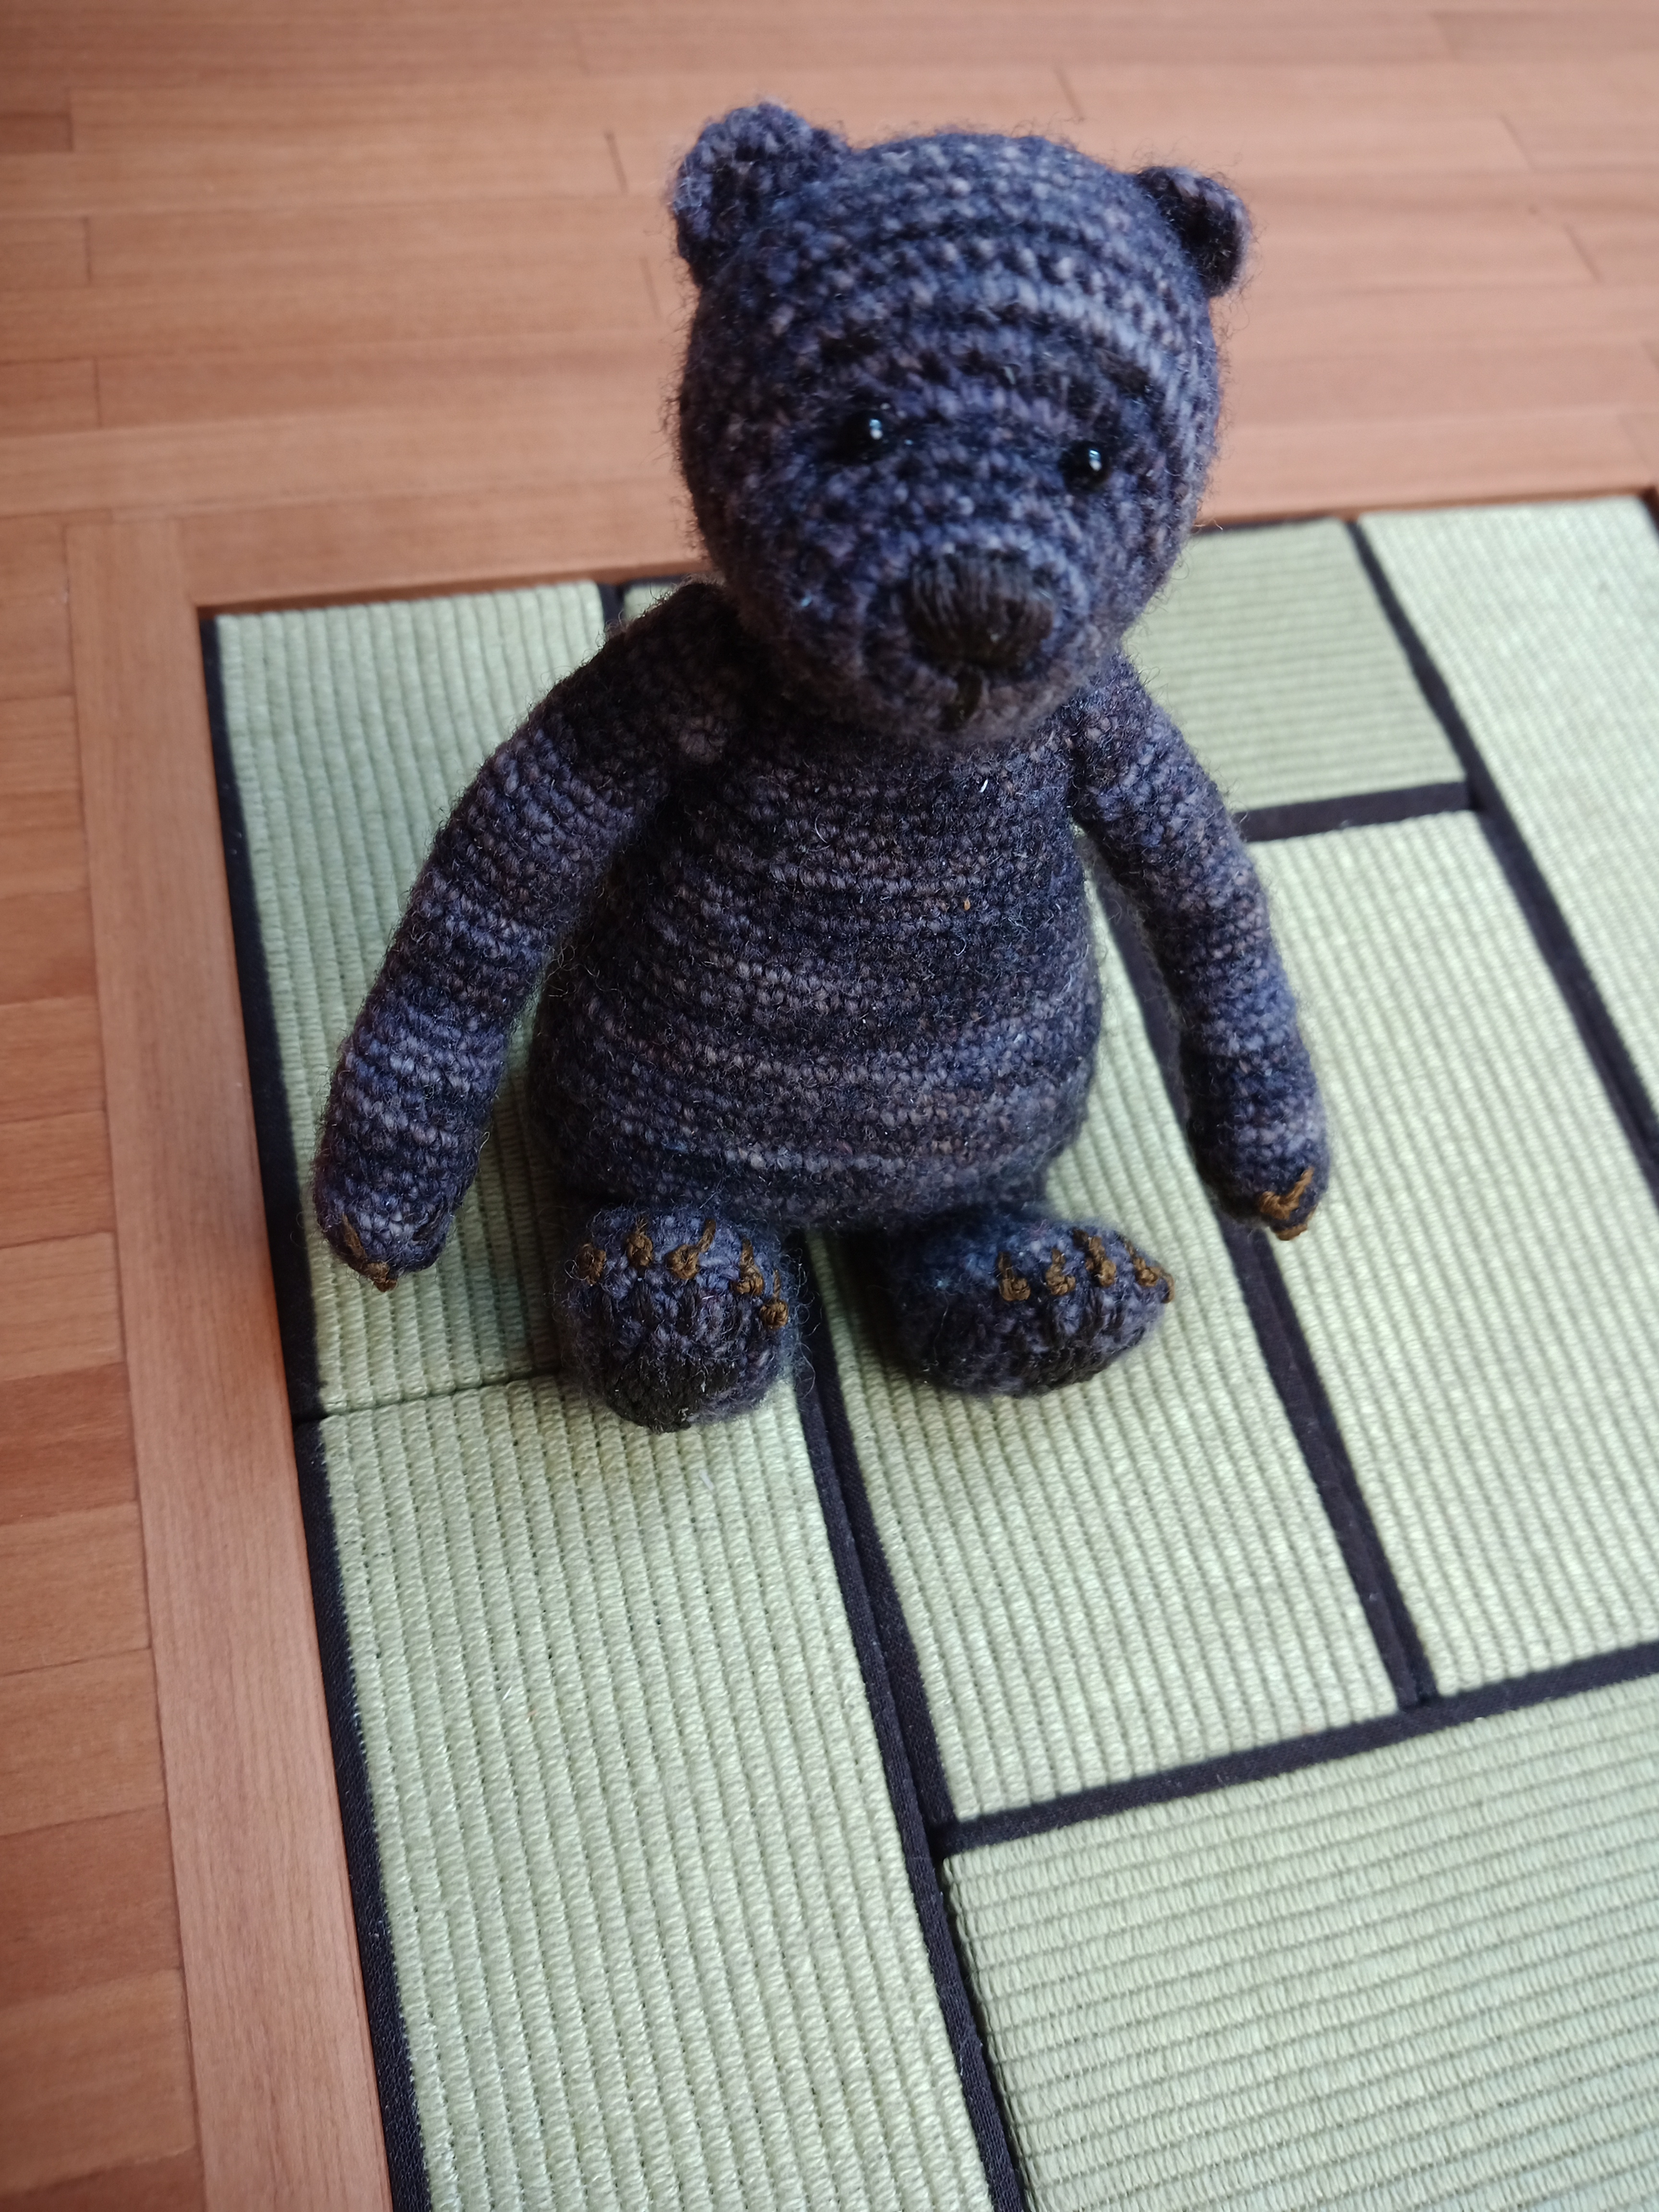
And that would also be the first hurdle: Ursula has really short legs so when she sits, it is with straight legs so a humanoid chair will not fit her well. Then came the idea that she could have a Japanese style living room with a kotatsu table, but sitting on the floor for long gaming sessions is uncomfortable even if you are a well padded winter ready bear. Which leads to our today's topic: tatami mats.
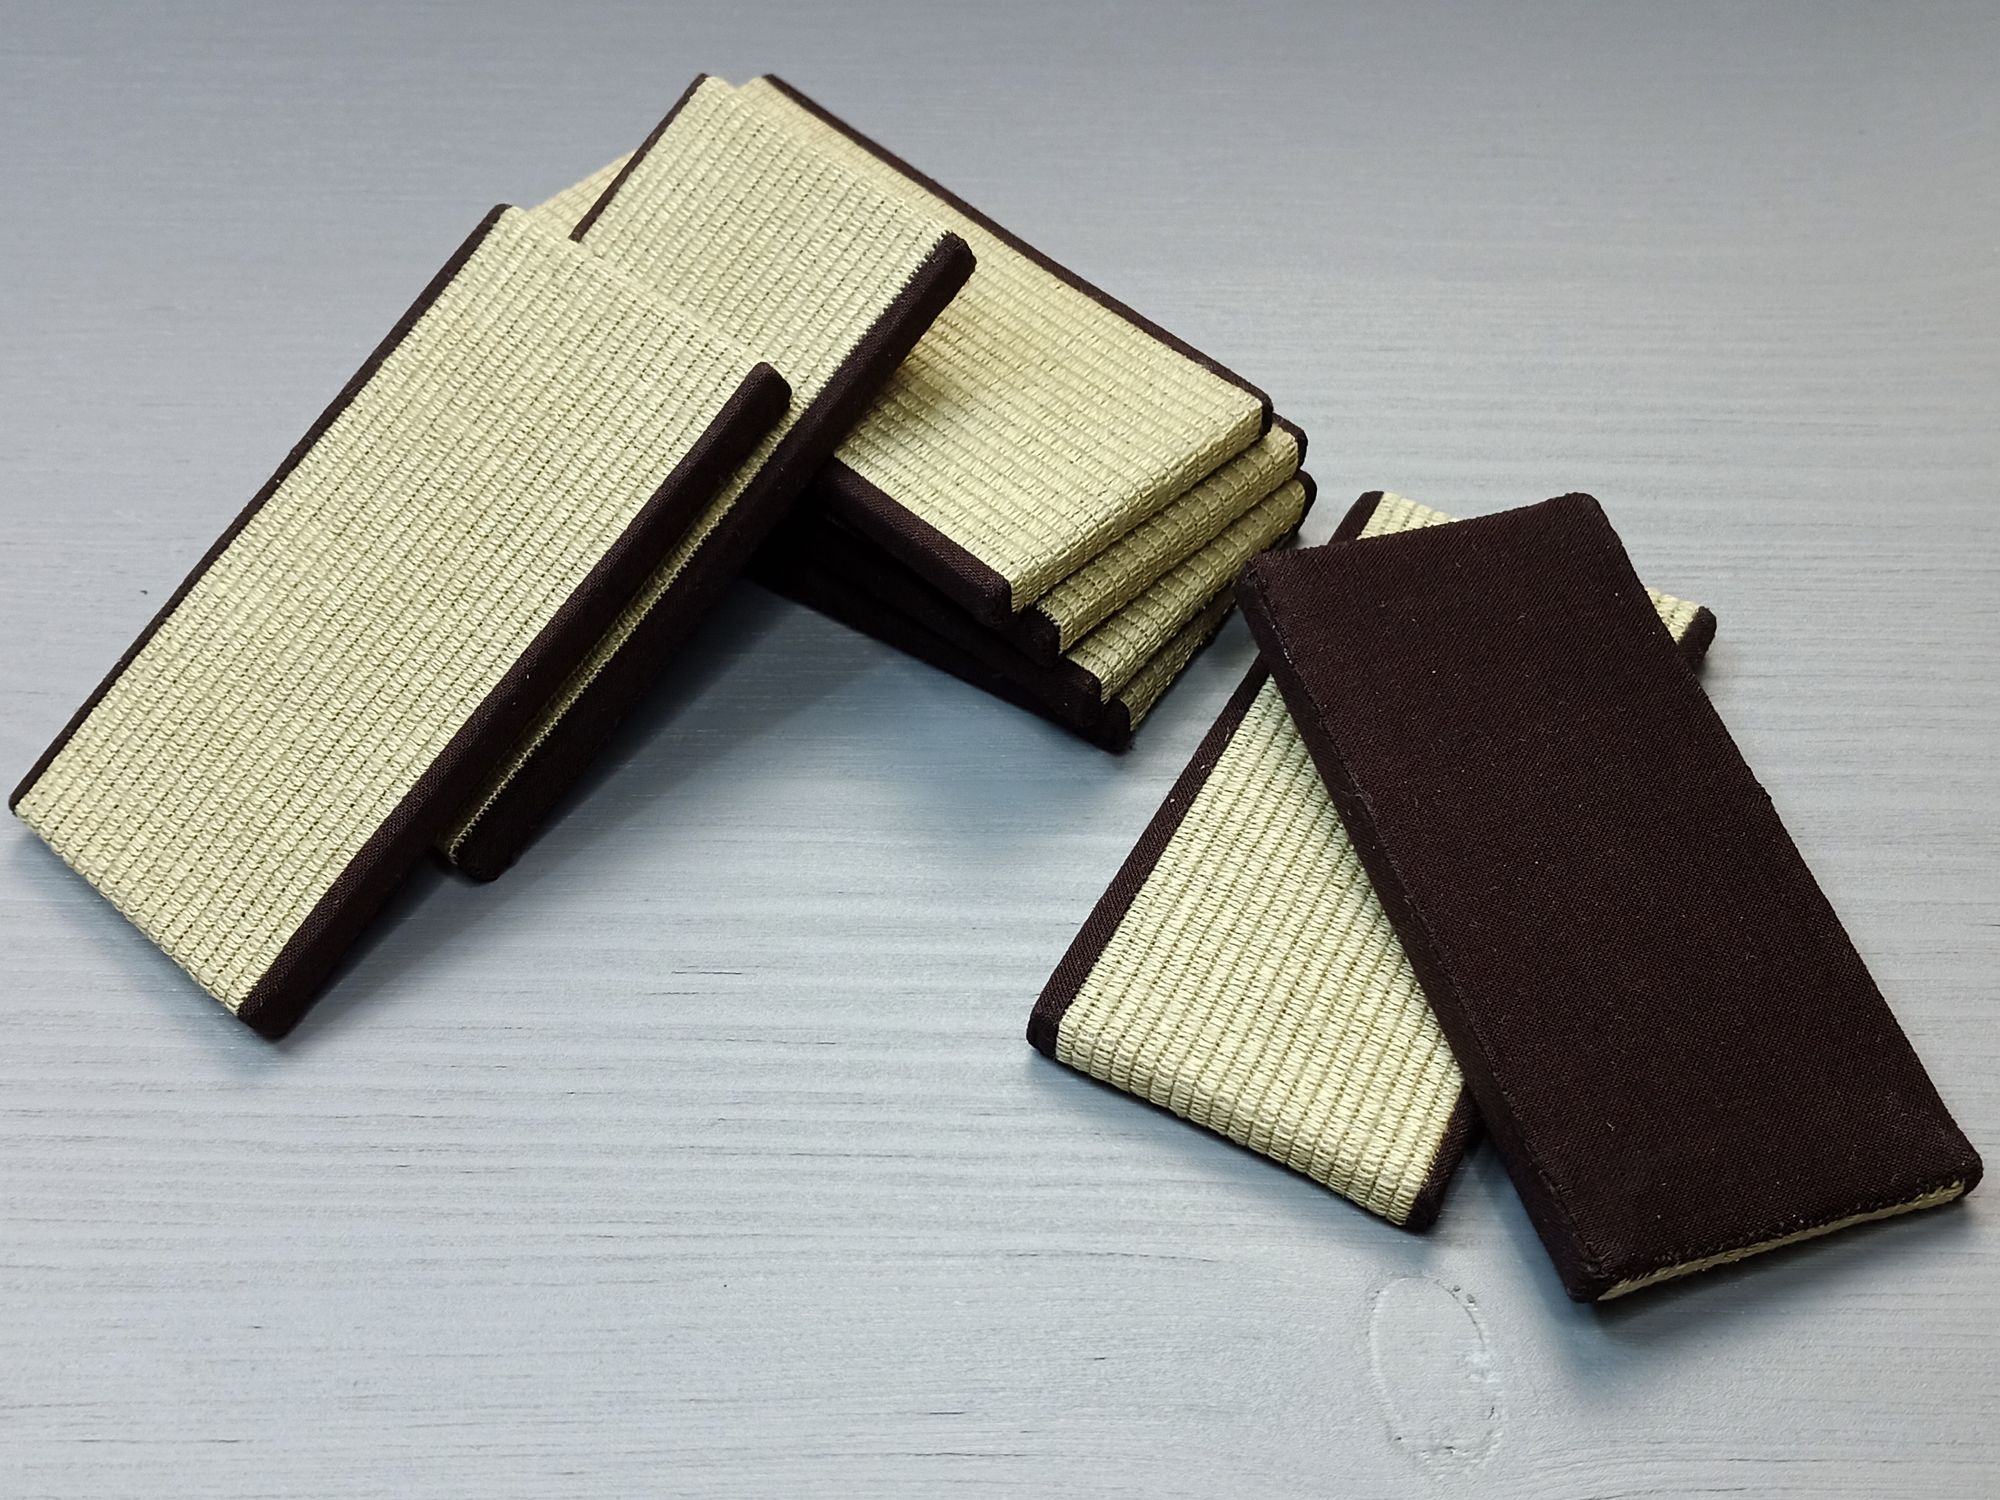
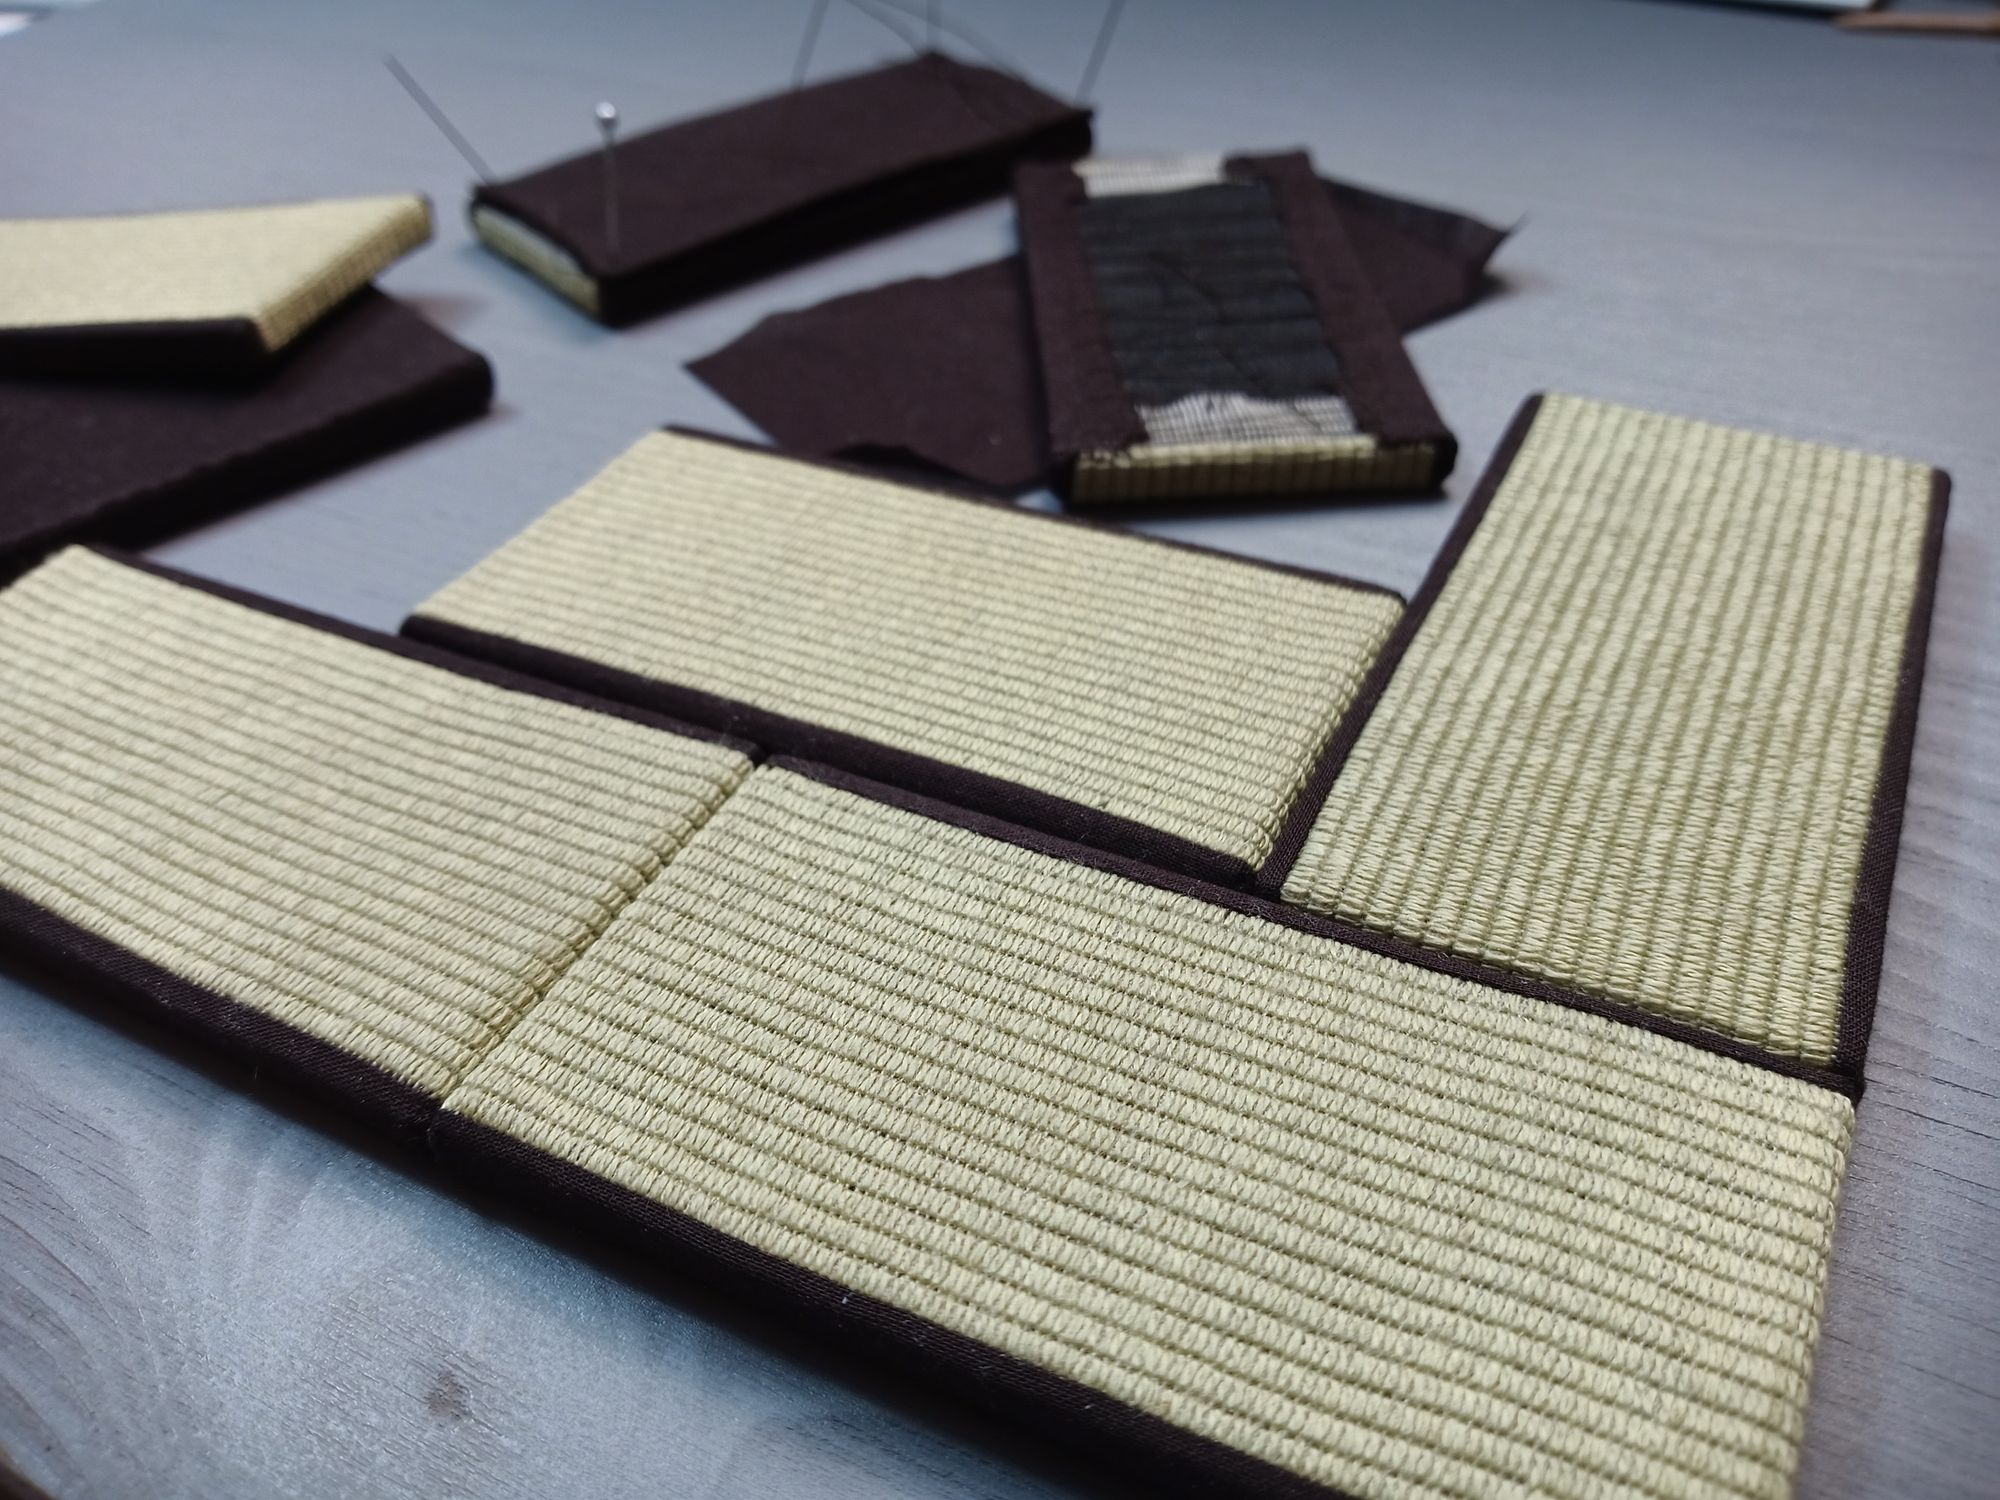
Tatami mats are traditionally topped with woven rush and the long edges are covered with fabric, the core of the mat should be rice straw. The mat is around 90*180 cm or in my case 4*8 cm. After thinking about and deciding against the idea to paint and weave actual coconut fibres I opted for a simple stitched version.
I had in my stash some linen embroidery floss by DMC, tried a few stitch types and settled on a 3 hole wide back stitch on 38 HPI silk gauze. It was perfection, the linen doesn't take dye evenly so there is a more natural look to it and it also got thinner and thicker bits. It was just what I wanted, it looked great, photographed well and I finally found a use for that particular type of embroidery floss. After completing the first prototype I knew just how much linen floss I needed.
Off I went to the shop I used to buy most of the embroidery bits... aaand it's closed down in 2019, oh well there must be another one, right? Lets just search for the linen floss... hmm only ebay results with one of the listings stating it as discontinued, uh-oh.
Yeah, turns out the linen floss was discontinued over 6 years ago. It's not surprising to be honest, it was quite aggravating stitching with it. So cotton floss it is.
Construction
Materials used:
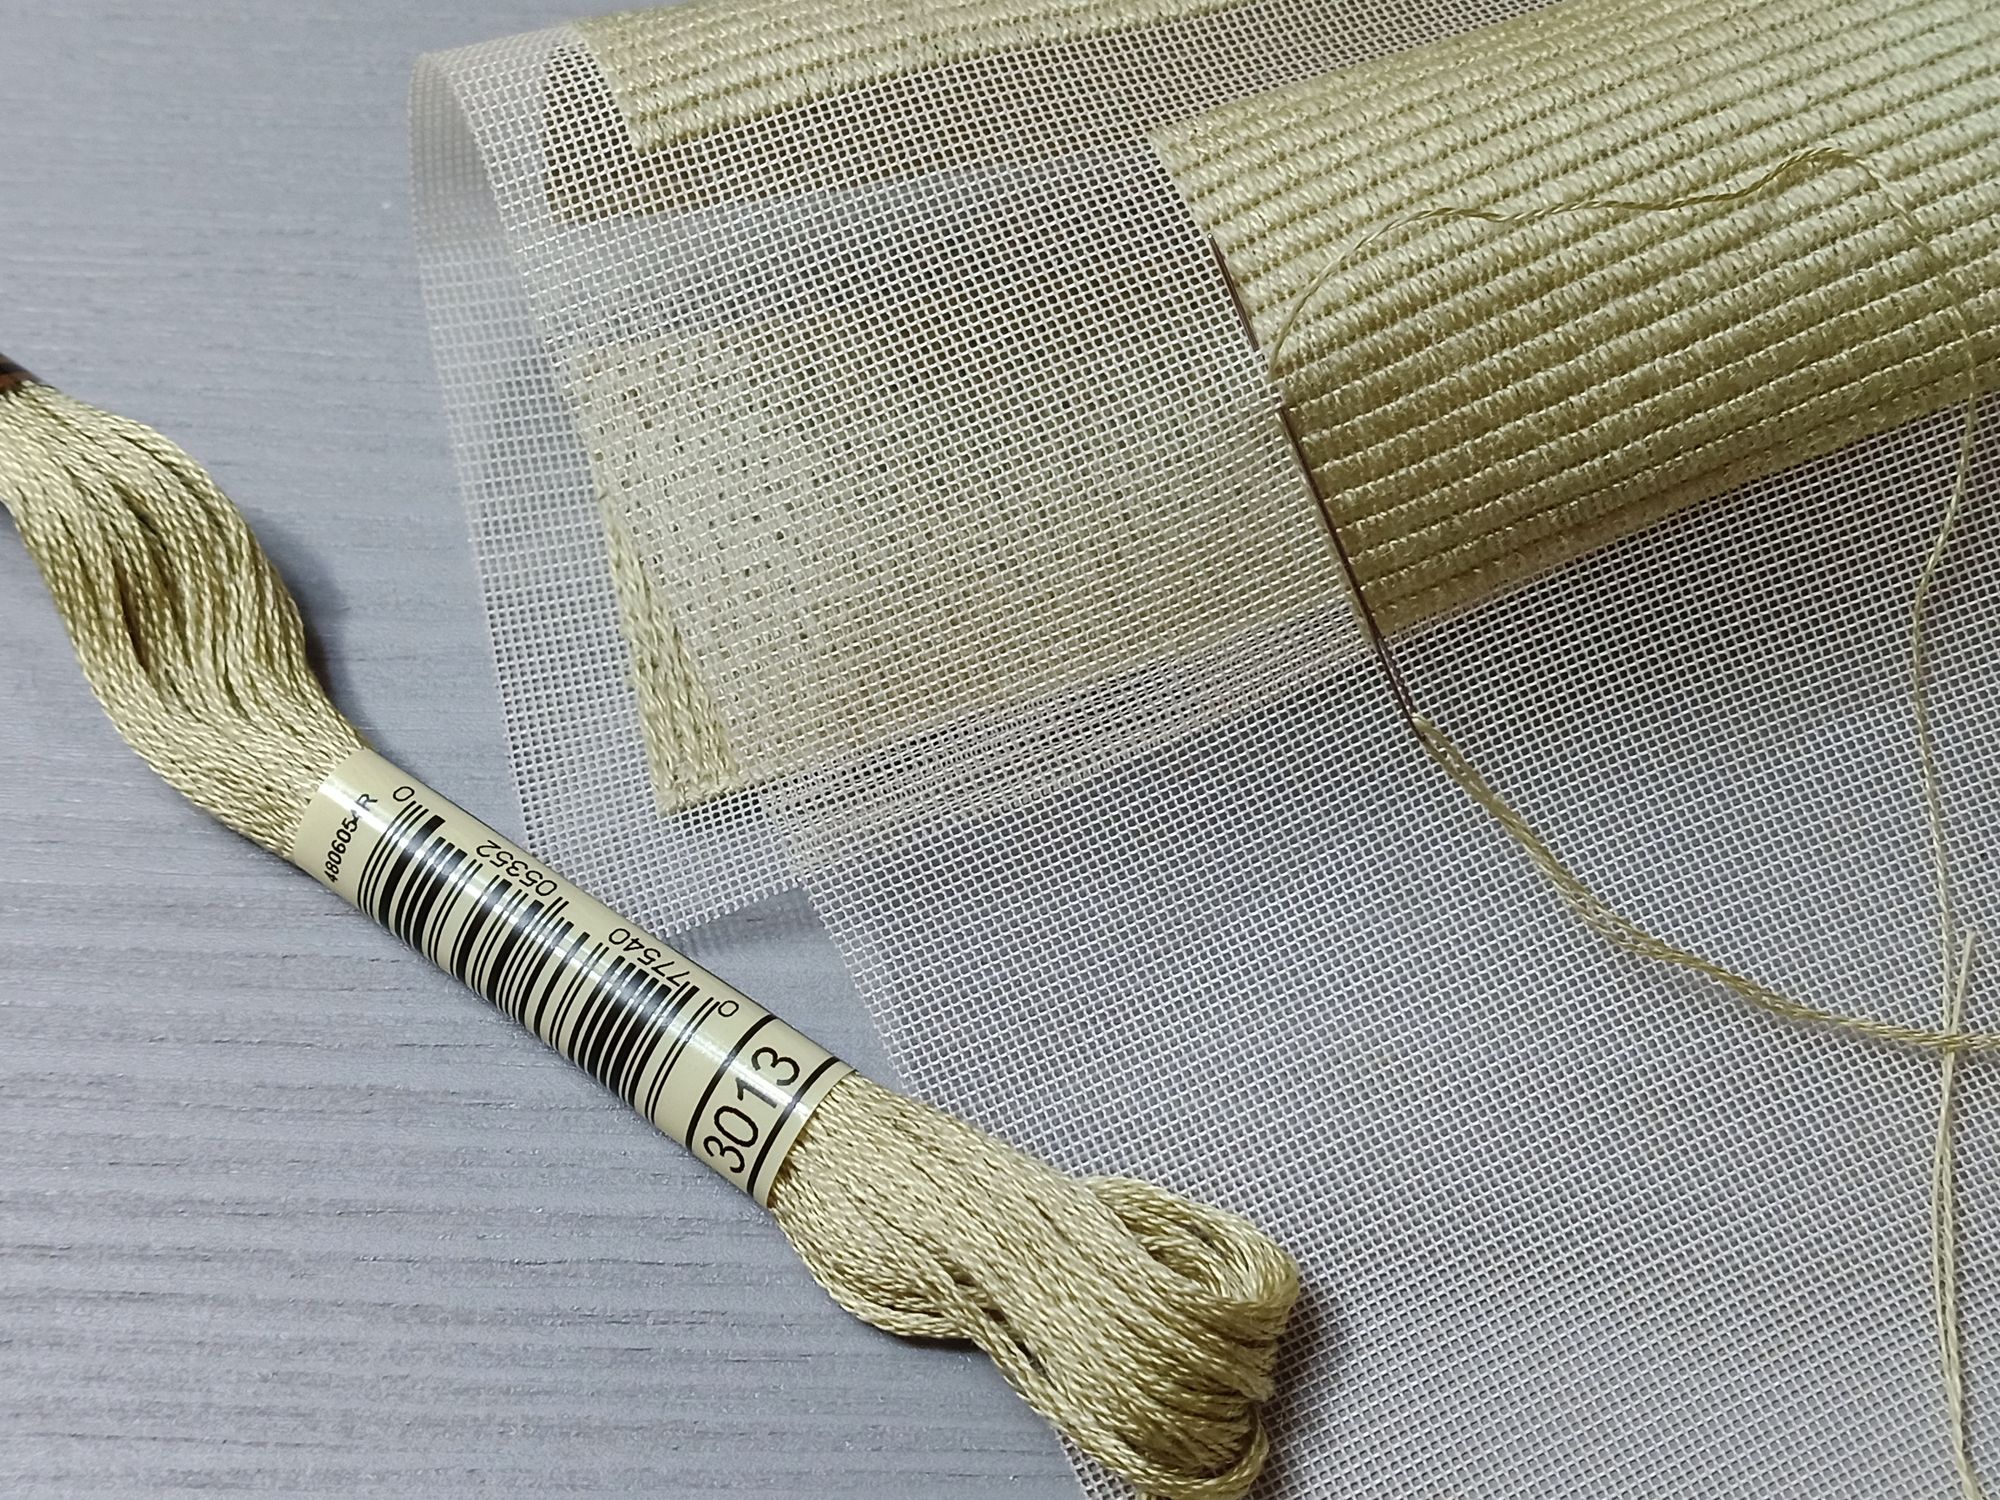
- 38 HPI silk gauze,
- DMC embroidery floss 3013,
- 2mm thick craft foam,
- thin but firm plastic,
- cotton lawn (or any thin fabric suitable for miniatures) and
- matching sewing thread
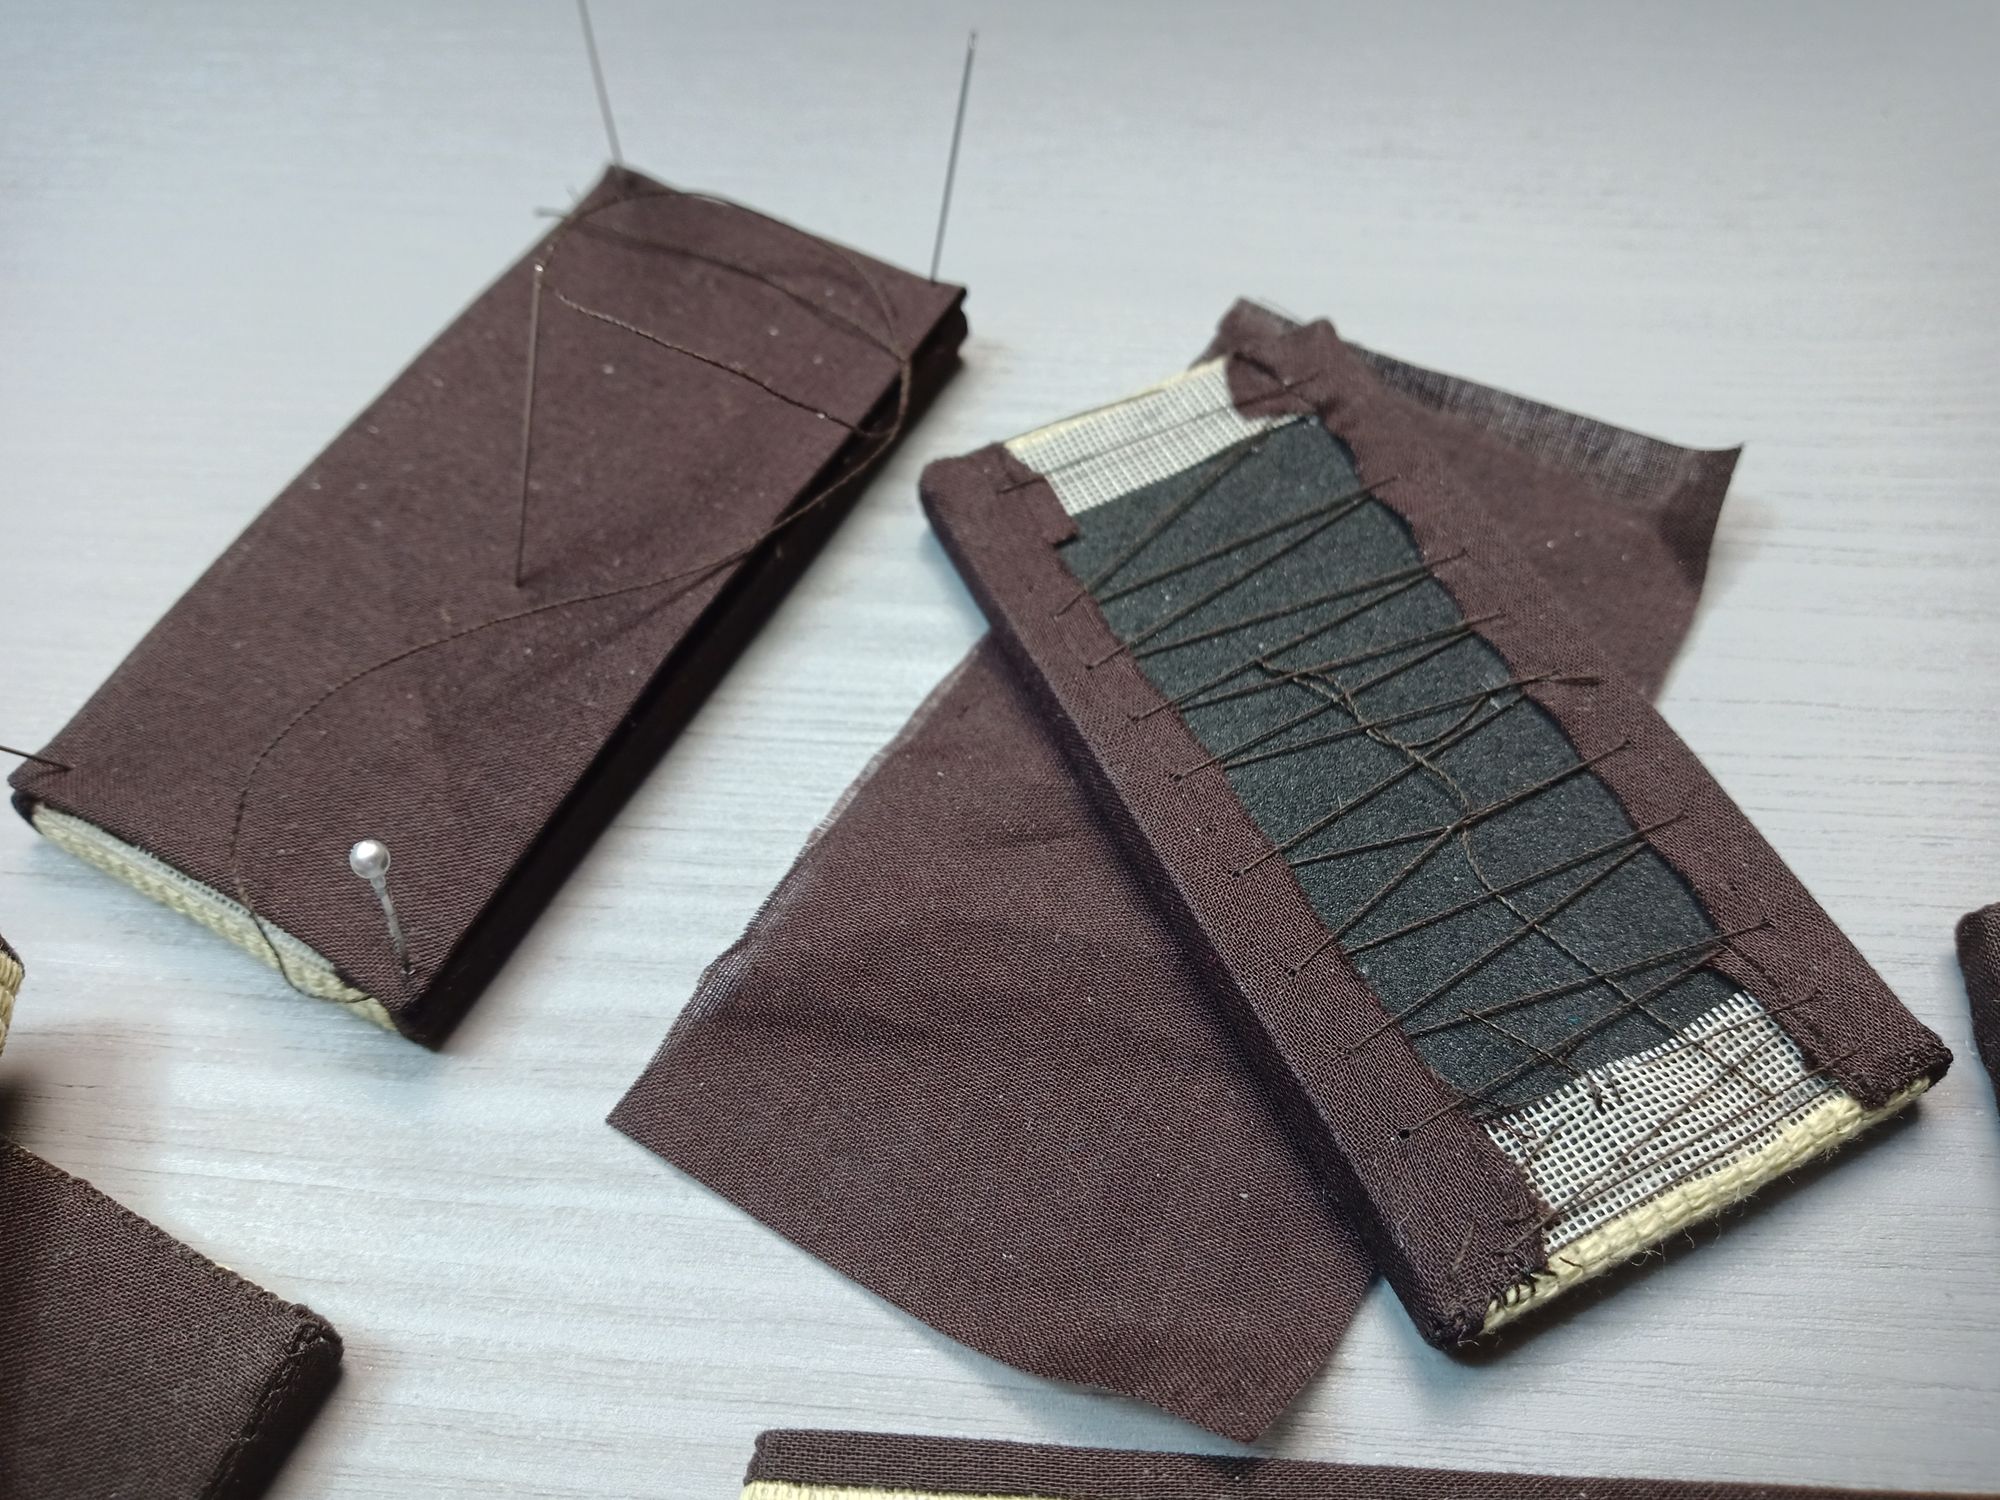
First I made (and forgot to take photos of) the core of the mat. I cut the foam 2 mm shorter and 1 mm narrower than my finished mat size, 78*39 mm instead of 80*40, glued two sheets together (if you can find thicker foam or you want a thinner mat you can skip this gluing bit)
While the foam dried, I cut 4 mm wide thin plastic strips and glued it on the sides of the foam (in this case it was 0.3 mm white PLA sheet, if I had planned a bit better, I would have ordered a big box of croissants, just for the packaging of course!) You need these thin plastic strips so the mat has sharper, less rounded edges and flatter sides.
The embroidered bit for the mat cover is 36 mm wide and 88.5 mm long on 38 HPI silk gauze, yielding 18 3 hole wide stitches. Leave 7 hole wide fabric around each mat (14 between 2 mats if you are stitching more mats on one gauze)
After the embroidery is done it's time to add the dark brown edging fabric, I folded the long edges of silk gauze leaving 2 rows from the edge of the embroidered bit, a quick running stitch at the top row to hold it in place for the actual sewing. Sew on the dark brown cotton lawn. (The dark brown fabric is 2 cm wide.)
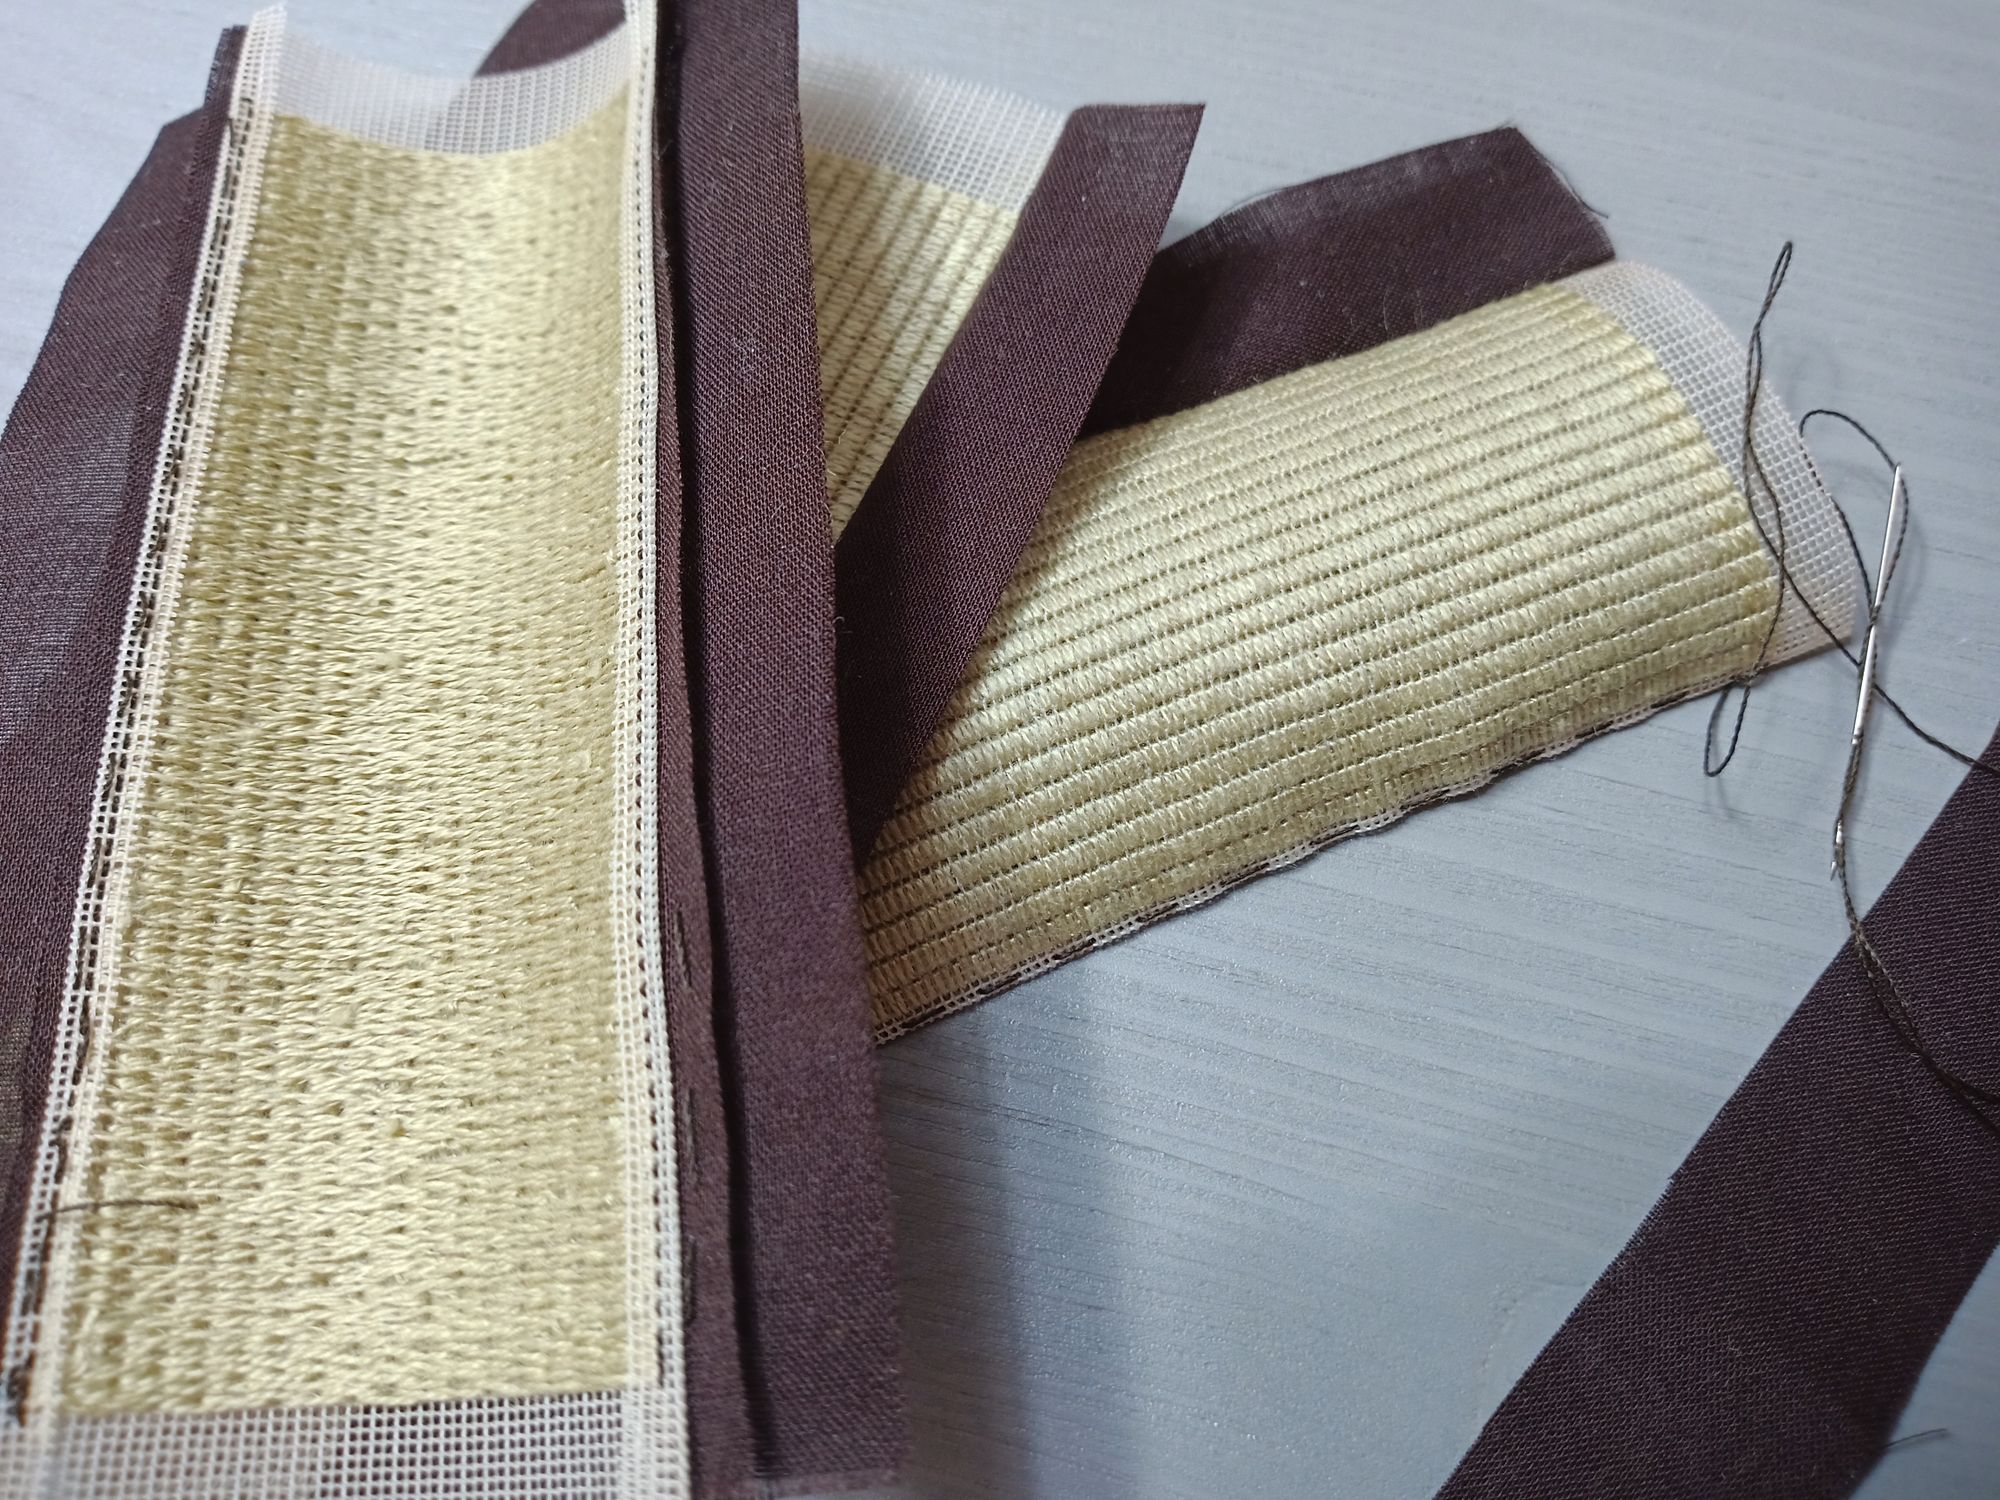
I glued on the cover to the foam with high tack PVA, I tried to centre it so that it has the same amount of brown fabric on the edges. Fold and glue down the short edges around the short sides, tuck in the corners, and with thread pull the long brown sides together at the back.
The last step is to add a backing fabric to hide the messy bits.
Of course if it weren't for COVID I would have gone to a big fabric shop and looked for a woven fabric that resembles a mini tatami and I could have skipped the embroidery bit. Also if you don't need a mat that you can push pins in, you can use cardboard or matboard instead and that way you can skip the thin plastic strips around the core too.
After all, it's not like they need to take the weight of a real bear.